New Zealand growing guide
Ready-to-Grow Oyster Mushroom Bag Instructions
A colonised grow bag already contains mushroom mycelium and its food. Your job is to give the developing cluster an opening, moisture, fresh air and indirect light.
Is the bag ready to fruit?
Use the supplied culture's readiness instructions first. Colonisation by the intended mycelium and the appearance of small oyster pins can support that assessment, but white growth or early pins alone do not prove a block is ready or uncontaminated. Substrate may still show through the mycelium.
Six steps from bag to harvest
- Choose a place. Put the bag somewhere clean with indirect daylight, good airflow and no direct hot sun. A moderate room temperature suits many oyster strains; the best range depends on the identified culture. Avoid a hot water cupboard that may overheat the block.
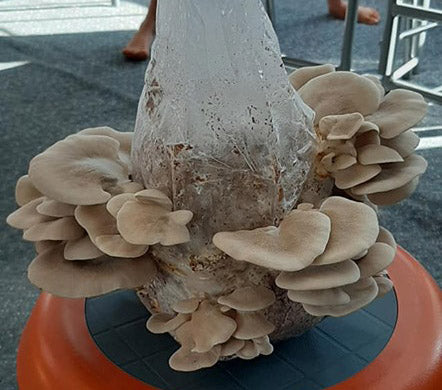
- Make a small opening. Once the block meets its culture-specific readiness instructions, cut a small slit where you want a cluster to emerge. Keep the rest of the bag closed so the substrate does not dry out. Watch the bag-cutting video.
- Maintain humidity. Keep the air around the opening humid. Use a clean mister for the inside of a simple fruiting tent or nearby surface as needed, while avoiding standing water in the bag and waterlogged mushrooms.
- Provide fresh air. Do not leave a fruiting bag inside a sealed tub. Oyster mushrooms with long stems and tiny caps often need more fresh air. Balance ventilation with humidity so the pins do not dry out.
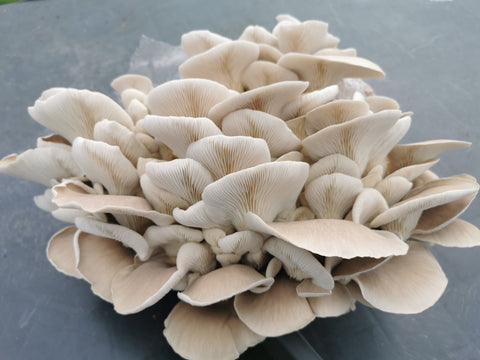
- Harvest the whole cluster. Pick or cut it at the base when the caps have expanded but are still reasonably firm and the edges have not curled upward. Check daily as it approaches maturity.
- Let the block rest. Keep it in suitable conditions and watch for another flush. Remove old mushroom remnants and keep the opening clean.
Growing in New Zealand conditions
The surrounding room changes with season. In winter, choose a place that stays within the culture's preferred range without excessive heat; in summer, prevent direct sun and overheating. A bathroom can be humid but should be clean and ventilated. A simple clear fruiting cover can help retain humidity, provided it is opened regularly for fresh air.
Mushrooms do not need strong sunlight, but normal indirect light helps fruit bodies develop. The exact temperature target varies among oyster species and strains; a single 18–22 °C rule cannot describe all of them.
A fruiting bag and its mushrooms
If growth is slow or misshapen
- Dry pins or cracked cap edges: increase humidity around the opening and check whether warm air or a direct draught is drying it.
- Long stems and small caps: improve fresh-air exchange while keeping the air humid.
- Water pooling in the bag: for an otherwise healthy block, follow the documented drainage method rather than leaving it submerged. Keep a suspect wet or deteriorating bag closed and isolated; condensation alone does not diagnose contamination.
- Unexpected mould or foul, slimy areas: keep the bag closed and separate it from other cultures. Do not open it for a close smell test. Do not eat affected mushrooms; dispose of a clearly spoiled block and clean the surrounding space.
Preparing for another flush
Many oyster blocks can fruit again after a rest, though later harvests may be smaller. Continue suitable humidity, fresh air and temperature. If the block has become noticeably dry, a short rehydration may help; follow the instructions for that substrate and drain it completely. Do not leave water pooled inside the bag or assume a fixed number of days to the next flush.
Related reading
- Oyster mushrooms in New Zealand: species and cultivation
- Two-step oyster mushroom growing bag guide
- How to grow mushrooms on logs in New Zealand