New Zealand growing guide
Two-Step Oyster Mushroom Growing Bag Guide
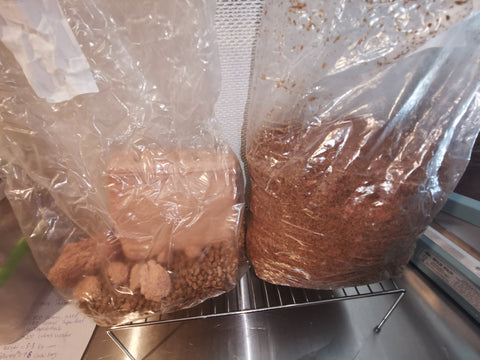
A two-step bag starts with substrate and oyster mushroom spawn kept separate. Prepare the substrate first; add the spawn only after it has cooled. Then allow the block to colonise before fruiting it.
Before you begin
Check that the culture is an identified oyster mushroom suitable for cultivation in New Zealand, the grain spawn looks healthy, and the substrate bag is designed for its intended heat treatment. A bag of dry pellets, a bag of straw and a supplemented sawdust mix need different preparation. Keep the culture name and origin with your growing notes. If importing spawn or cultures, check MPI's current requirements.
Step one: prepare and cool the substrate
- Choose the right treatment. Follow a tested method for the material in your bag. Some prepared wood-pellet mixes are hydrated with hot water; other substrates need pasteurisation or sterilisation. Pouring boiled water into any arbitrary bag does not establish that the whole substrate received an adequate treatment.
- Use heat-safe equipment. If the preparation calls for hot water, use a bag or container rated for it, on a stable surface. Keep hands and skin clear of hot water and steam. Do not heat-seal a bag while it contains hot substrate unless its instructions specifically require it.
- Let it cool all the way through. Keep the treated substrate covered as directed and wait until its centre is at room temperature before adding spawn. Warm substrate can damage the mycelium. Watch the substrate-preparation demonstration.
Step two: add spawn and allow colonisation
- Work cleanly. Wash hands, wipe the work surface and use clean tools. Open the cooled substrate and healthy spawn for as little time as practical. Avoid wind, dust and nearby mouldy materials. This clean-handling approach applies to an appropriate pasteurised-straw method. Sterilised grain or supplemented blocks need a protected aseptic transfer setup with sterile tools; a wiped bench alone is insufficient.
- Mix and close. Add spawn at the rate recommended for the substrate and mix it through evenly. Close the bag using its designed seal or tie. If it has a filter patch, keep that patch unobstructed: growing mycelium needs gas exchange, while the bag remains protected from dust.
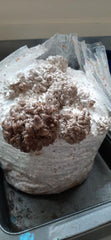
- Watch the block, not just the calendar. Place it within the known culture's incubation range, away from direct sun and overheating. Mycelial growth produces heat inside the bag, so a hot-water cupboard can become too warm. The substrate should gradually turn white as the intended mycelium spreads; timing varies with species, spawn rate, substrate and temperature.
Fruiting, harvest and another flush
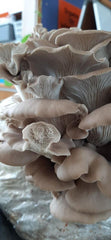
When the block is well colonised or small pins appear, cut a small opening where a cluster can emerge. Keep the surrounding air humid and provide indirect light and regular fresh air. A sealed tub may keep humidity high but can produce long stems and undersized caps. Watch the bag-opening demonstration.
Harvest the whole cluster when caps have expanded but before their edges turn strongly upward or release many spores. Leave the block in suitable conditions for a possible second flush. If it dries out, rehydrate it only as appropriate for that substrate and drain it well; do not leave water pooled in the bag. The next flush has no fixed schedule. For more detail, see the ready-to-grow bag guide.
What the stages look like
Troubleshooting
- No colonisation: check whether the substrate was fully cool when inoculated, the spawn was viable and the incubation temperature suits that culture.
- Green or black patches, a foul smell or slimy areas: keep the suspect bag closed and isolate it from other cultures. Do not open it for a close smell test. Do not eat mushrooms from a clearly contaminated block; dispose of it carefully and clean the work area.
- Water collecting at the base: review hydration and drainage. Excess moisture can favour unwanted microbes.
- Long stems and small caps: increase fresh-air exchange during fruiting while maintaining humidity.
- Dry or stalled pins: check humidity, direct sun and drying draughts around the opening.
Related reading
- Liquid culture for oyster mushrooms in New Zealand
- Hardwood and soy hull substrate: a Master’s Mix guide
- Ready-to-grow oyster mushroom bag guide
- Oyster mushrooms in New Zealand: species and cultivation
- How to grow mushrooms on logs in New Zealand