Learn · Substrates
Straw Substrate and Pasteurisation for Oyster Mushrooms
A reliable straw grow starts with suitable material, a measured treatment, and clean handling. Lime, hot water, and sterilisation have different roles.
A small batch of clean, unsupplemented straw with a known oyster culture.
Material and water quantities, treatment conditions, drainage, and batch results.
Pasteurisation or alkaline treatment reduces competitors; it does not establish sterility.
Choose a substrate you can trace
Straw is the dried stalk material left after cereal harvest. It differs from leafy hay, and changing between them changes the recipe. Wheat straw is a well-established oyster substrate. Start with clean, dry material that has been stored away from damp floors, pests, and chemical spills. Reject visibly mouldy or decomposing bales.
Record where the straw came from and ask about treatments or additives. Do not assume a substrate becomes suitable for food production because a mushroom grows on it: fungi can take up contaminants, and microbial treatment does not remove every chemical hazard. Use an identified oyster culture with a documented source and growing instructions appropriate to New Zealand.
Understand what treatment can achieve
Hot-water pasteurisation uses controlled heat to reduce competing organisms. Alkaline soaking uses elevated pH to create less favourable conditions for many competitors. Both can support oyster cultivation on unsupplemented straw; neither makes every batch sterile.
Sterilisation is a more demanding process intended to eliminate viable organisms, including resistant spores. It requires an appropriate method and verified exposure throughout the load. A pressure gauge reading alone cannot demonstrate that a bag's centre received sufficient treatment. Grain spawn and richly supplemented blocks therefore need their own preparation and aseptic handling procedures.
Prepare a small, measurable batch
Chop long straw so it mixes and packs consistently. Avoid reducing it to a dense mat of dust. Clean the container, draining equipment, work surface, and tools before starting. Keep untreated straw away from the area used to handle treated material.
Write down the dry straw mass, water volume, treatment method, and container size. When following a spawn rate, record whether its percentage refers to dry substrate, hydrated substrate, mass, or volume: these are not interchangeable. Prepare labels and have clean spawn ready before treatment ends. Small batches make it easier to identify where a process failed and to repeat a successful result.
Hot-water pasteurisation
For unsupplemented wheat straw, a published home cultivation protocol uses a water bath at approximately 74°C for one to two hours. This is a starting protocol for that material, rather than a universal schedule for every substrate, bag size, or mushroom. Use a thermometer, ensure the straw is fully wetted and submerged, and check representative positions in the load. Count the treatment period once the material has reached the chosen conditions.
A splash of boiling water followed by an unmeasured cool-down is less repeatable. Plan safe lifting and drainage before heating: wet straw is heavy and hot water can scald. Use equipment intended for the heat source and avoid improvised sealed heating vessels.
What hydrated lime actually means
Hydrated lime is calcium hydroxide, Ca(OH)₂. Garden or agricultural lime commonly contains calcium carbonate, CaCO₃, which does not behave the same way in an alkaline soak. Quicklime is calcium oxide, CaO, and reacts strongly with water; it is not a direct substitute. Building mixtures may contain magnesium compounds or other additives.
Check the product identity, composition, and safety data sheet. Low-magnesium hydrated lime is used in established oyster straw methods, but a magnesium percentage alone does not validate a batch. A claim such as “soak overnight” omits lime composition, water quantity, pH, straw loading, and contact time.
Follow a documented method that specifies these variables. Use a suitable pH meter or strips with the required alkaline range, and record conditions before and after contact with the straw. Do not guess a dose from the appearance of the solution or extend the soak on the assumption that longer is better.
Handle alkaline water carefully
Hydrated lime dust and wet alkaline slurry can injure eyes, skin, and airways. Follow the product safety data sheet for chemical-resistant gloves, eye protection, protective clothing, and dust control. Mix in a ventilated area without raising dust, and keep children and animals away. Keep suitable washing water readily available.
Plan wastewater disposal with the supplier and local council before beginning. Keep alkaline liquid out of stormwater drains and waterways. Adding acid can release heat and cause splashing; do not improvise a neutralisation recipe. Treatment also needs a safe disposal process.
Drain, cool, and inoculate
Drain treated straw on clean equipment and allow heated material to cool to the culture's inoculation temperature. The centre can remain warm after the surface feels cool. Keep the material moist without pools of free water. Inoculate promptly once drainage and cooling are complete, using clean hands, clean tools, and healthy spawn.
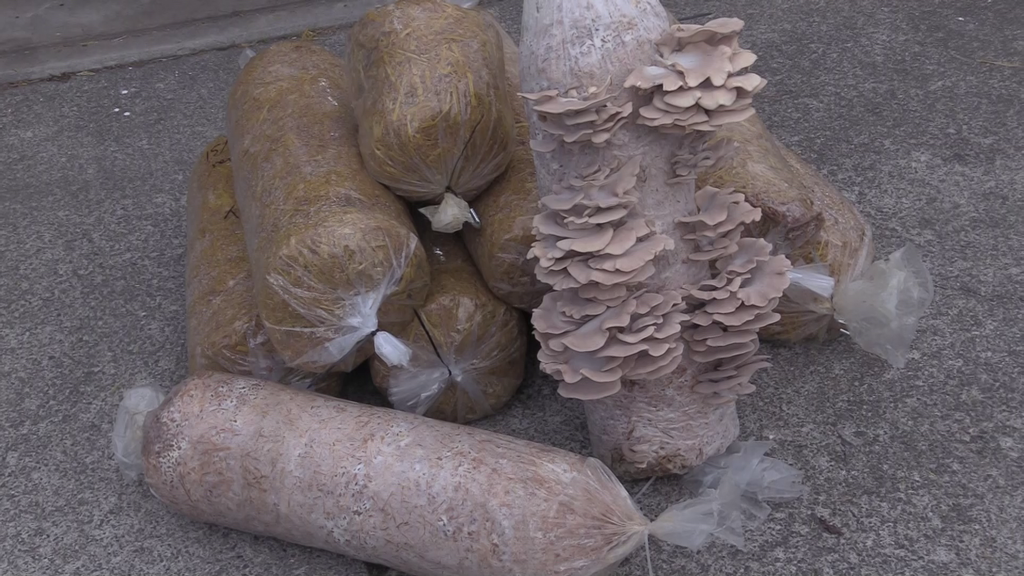
Mix spawn evenly and pack into a suitable container. See the grow bag and gas exchange guide for the differences between perforated straw tubing and filtered bags. Label the batch and use the culture's incubation conditions. A straw-growing container and a sterile grain-transfer container serve different purposes.
Improve the process before adding supplements
Soy hulls, bran, and similar ingredients can change nutrition and yields, but they also provide food for competing organisms. Adding them to straw creates a different formulation; it is not simply an automatic upgrade to the same pasteurisation method. Establish consistent unsupplemented batches first, then trial one change at a time with an appropriate treatment and handling procedure. The hardwood and soy hull guide explains a separate block-production approach.
Track colonisation, contamination, harvest mass, and failures as well as successful bags. Isolate bags with spreading mould or unusual wet decay; do not open them in the clean work area or attempt to smell them closely. Investigate material quality, drainage, spawn, and handling before changing several variables at once.